How Can We Help?
Update E-mail Settings in Microsoft Outlook 2010
![]()
Once the E-mail Migration of 2018 is complete, customers with an e-mail address that ends with @widomaker.com (or tni.net) will need to update the settings in their e-mail software. This article contains instructions for customers using the Microsoft Outlook 2010 (14.0) e-mail software, on their desktop, or laptop computer.
- Open Microsoft Outlook to the main e-mail screen.
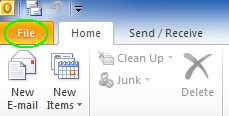
- Click the FILE menu at the top-left of the Outlook window, as shown in the image, below…
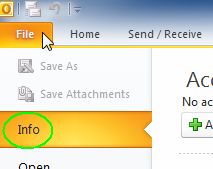
- Click INFO on the left side menu, as shown in the image, below…
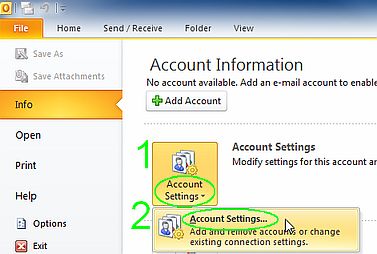
- Click the Account Settings square, then “Account Settings…” in the drop-down menu, as shown in the image, below…
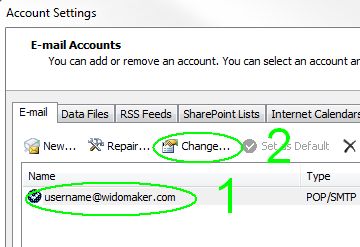
- Once the Account Settings (Email Accounts) window is displayed, select your e-mail account in the centermost window, then click the Change button, as shown in the image, below…
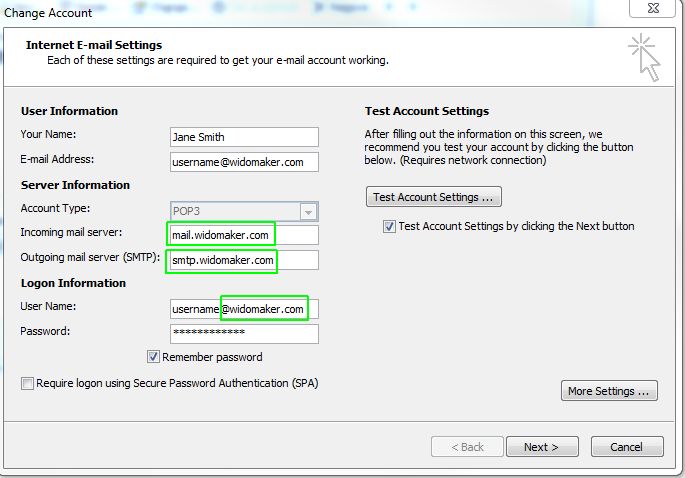
- Once the Change Account (Internet E-mail Settings) window is open, edit the “User Name:” field. Previously, it only contained your username. Make sure that it contains your full e-mail address, instead of just the username, by adding “@widomaker.com” (without quote marks).

- Make sure that the other settings match what is highlighted with green rectangles, in the image, below.
- Incoming mail server: mail.widomaker.com
- Outgoing mail server (SMTP): smtp.widomaker.com
- User Name: Your full e-mail address (all lowercase letters)
- Click More Settings in the bottom-right corner of the Change Account (POP Account Settings) window.

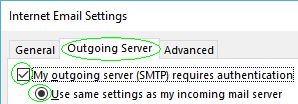
- Click the Outgoing Server tab. Verify that “My outgoing server (SMTP) requires authentication” is checkmarked ☑ and “Use same settings as my incoming server” is selected.
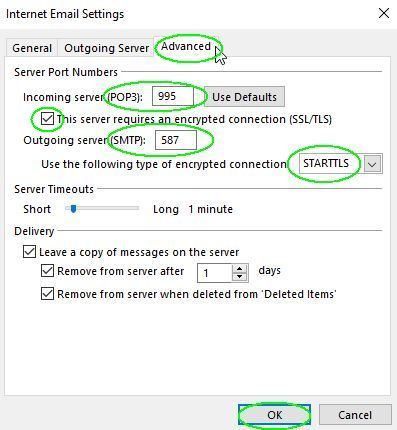
- Click the Advanced tab. Make sure that the settings match what is highlighted with green rectangles, in the image, below.
- Server Port Numbers
- Incoming server (POP3): 995
- This server requires an encrypted connection (SSL/TLS): ☑ (checkmarked)
- Outgoing server (SMTP): 587
- Use the following type of encrypted connection: Auto or STARTTLS
- Server Port Numbers
- Click OK.
- Click the Outgoing Server tab. Verify that “My outgoing server (SMTP) requires authentication” is checkmarked ☑ and “Use same settings as my incoming server” is selected.
- Click NEXT.
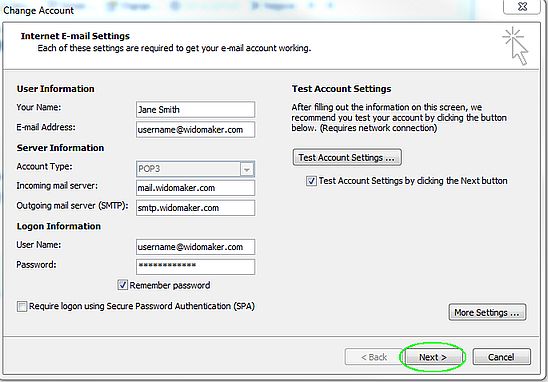
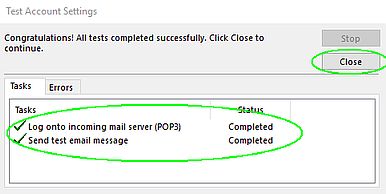
- Outlook will test the settings. Once the test has finished, click CLOSE in the Test Account Settings window.
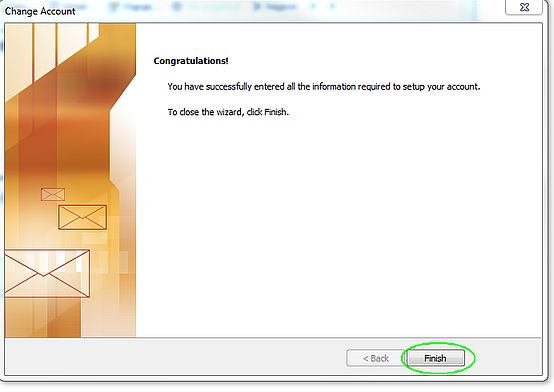
- Click FINISH.
- Click CLOSE.

- All done! Now test checking and sending mail to confirm Outlook is working properly. Sending yourself a test message is an easy way to test that the settings are correct and Outlook is working properly.

