How Can We Help?
Update E-mail Settings in Apple iOS 11.3 on iPhone & iPad
![]()
Once the E-mail Migration of 2018 is complete, customers with an e-mail address that ends with @widomaker.com (or tni.net) will need to update the settings in their e-mail software. This article contains instructions for customers using Apple’s iOS 11.3 on an iPhone or iPad, with the default Apple mobile e-mail app.
- Open the ⚙ Settings app on your Apple iOS device.
- Scroll down the left-side menu of Settings until you reach Accounts & Passwords. Select or tap on Accounts & Passwords.
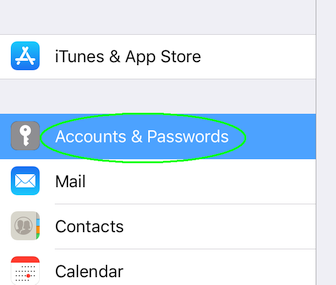
- On the right-side, select or tap your Widomaker e-mail account.
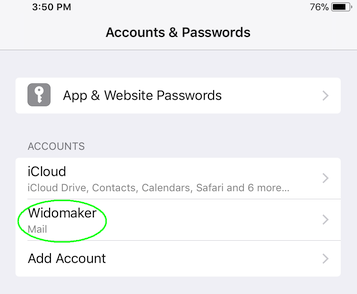
- On the new screen, tap your Widomaker e-mail account.
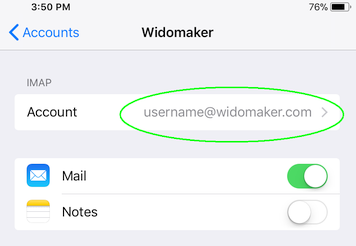
- Edit the “User Name” field. Previously, it only contained your username. Make sure that it contains your full e-mail address, instead of just the username, by adding “@widomaker.com” (without quote marks).
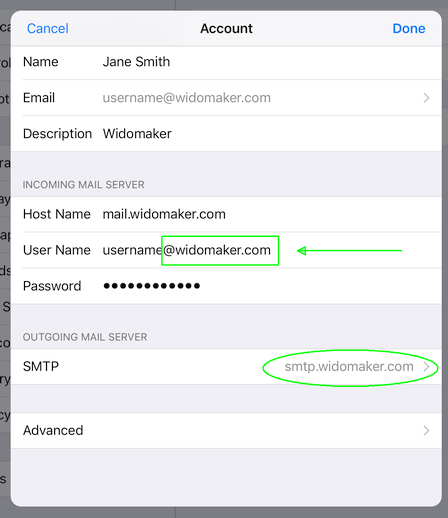
- Tap on the Widomaker SMTP server.

- On the new screen, tap the Widomaker SMTP server.
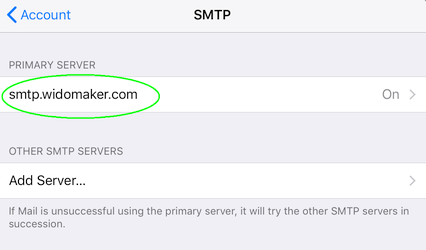
- Edit the “User Name” field. Previously, it only contained your username. Make sure that it contains your full e-mail address, instead of just the username, by adding “@widomaker.com” (without quote marks).

- Make sure that the other settings match what is highlighted with green rectangles, in the image, below.
- Host Name: smtp.widomaker.com
- User Name: Your full e-mail address (all lowercase letters)
- Use SSL: ON
- Authentication: Password
- Server Port: 587
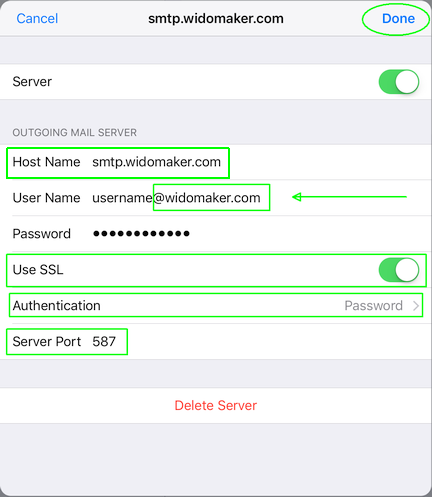
- Tap DONE at the top-right corner.
- Tap the backwards pointing arrow, at the top-left corner, to go back to the Account screen,

- Tap Done in the top-right corner.
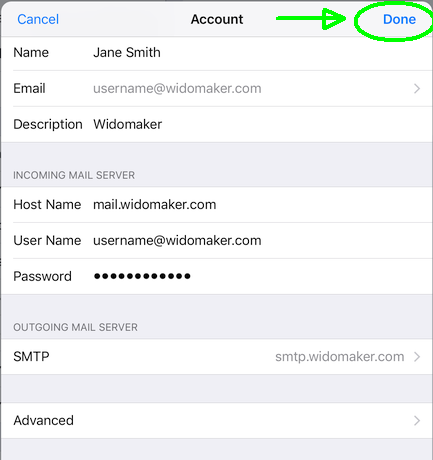
- All done! Press the device’s home button, open the ✉ e-mail app, and test checking and sending mail to confirm Apple’s iOS e-mail app is working properly. Sending yourself a test message is an easy way to test that the settings are correct and e-mail is working properly.

